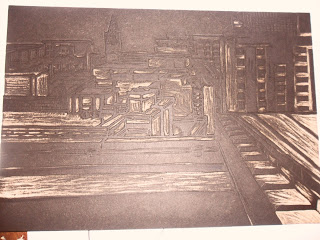
So for the past two weeks I have been working solely in the area of print, an area of art in which I have great interest. We got to try drypoint and mono printing for the first week of the elective, which I have to say I did not particularly enjoy. It just didn't seem like my thing. But just as soon as my love for the discipline waned, woodcutting came back into my life and print and I could see eye to eye again.
Here are a few shots of my work:
Followers
Friday, January 25, 2013
Contextual Research (Print)
So i've been looking at a small few printers that have caught my eye lately.
Tobias Till
I love how Till focuses on intricate detail within urban spaces. His prints of London city and airport are overflowing with tiny details. I drew inspiration from when I decided to do my A3 print of limerick city. I tried to focus on the little details that I thought would make the print look great.
Here are some of my favourite Tobias Till prints:
London City Airport
London Bridges
River Walk, San Antonio
Martin Langford:
Another great example of a printer that focuses on very detailed prints.
I love how he puts his own spin on everyday urban sights and makes a statement at the same time. Here are some examples of that:
Temple
Consumer
Industree
Those were my two biggest influences over the past two weeks. They helped me figure out which direction I wanted to go in with my work.
Sunday, January 6, 2013
Last few!
So just a few more little bits before my assessment!
These are a few pictures of my last two cans during the peeling process and afterwards. There's also a few pictures of all of my best casts together. The last two are of a little bottle that I filled with wrappers. I think its shows compression well and its looks really cool with the shine from the wrappers.
Here is my stop motion:
I used stop motion to create this video. I had to work backwards though, because you cant really crush a cup in slow motion! I have two versions uploaded, one is the original, the other is one that I added a filter to.
That's about it for now! Will be back soon with my new briefs, cant wait!
Friday, January 4, 2013
BIG catch up!
OK so, to catch up on what I've been doing... I decided to move away from the idea of being trapped within a space to compression, and how it affects spaces. I love how interesting compression can make everyday objects look. Rubbish and waste is what i decided to focus on, so anything from used paper to crushed cars. I spent quiet a lot of time researching and looking at crushed or compressed waste. My first thought was to look at crushed cars. I think they look amazing when they are crushed into cubes because you can still see some of the defining features of the car within the block.
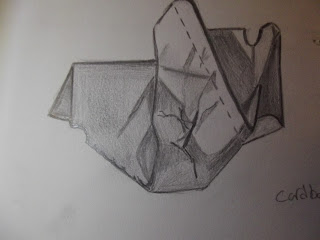
I then moved towards things i could crush myself, like paper and empty cans. This gave me a great opportunity to sketch and paint as research. Here are a few pieces from my sketch book:
I really like the look of the pen and water color drawings. They make the colors pop, and the highlights show up really well.
I then stacked some crushed cans on top of each other to get a contrast in color and shape.
The cartoon-like look of the picture really appeals to me.
I also looked at plastic bottles. I was skeptical at first, I didn't think that they would show the lines and contours of the compression as well as the cans did, but I was pleasantly surprised with the results.
For a while i wanted to work my own body into my work by compressing my own face. The results made for great pictures but I found it hard to apply them in any other medium.
During this time I found my love for print, a discipline that I had no interest in coming to art college, but my eyes have been opened! Whether its line drawing, cutting or stenciling I enjoy every minute of it!
Making woodcuts showing compression was a bit tricky but this is what i came up with:
I also made two stencils, which were fun to make and even more fun to spray!
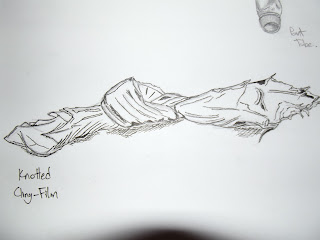
This line drawing really shows what i'm going for with my idea that compression makes waste look far more interesting:
From all of this I came up with my favorite idea so far! I decided to try and cast the shape of compressed items. I decided to go with cans and bottles because they would hold the plaster and resin best. Here are the results:
I absolutely love how these turned out, still yet to see anything like this done by anyone else.
As you can see I did some in plaster, and the other in an acrylic resin mixed with a red pigment for color.
That was a bit of a catch up on what I've been doing, more to come soon!
I then moved towards things i could crush myself, like paper and empty cans. This gave me a great opportunity to sketch and paint as research. Here are a few pieces from my sketch book:
I really like the look of the pen and water color drawings. They make the colors pop, and the highlights show up really well.
I then stacked some crushed cans on top of each other to get a contrast in color and shape.
The cartoon-like look of the picture really appeals to me.
I also looked at plastic bottles. I was skeptical at first, I didn't think that they would show the lines and contours of the compression as well as the cans did, but I was pleasantly surprised with the results.
For a while i wanted to work my own body into my work by compressing my own face. The results made for great pictures but I found it hard to apply them in any other medium.
Making woodcuts showing compression was a bit tricky but this is what i came up with:
I also made two stencils, which were fun to make and even more fun to spray!
This line drawing really shows what i'm going for with my idea that compression makes waste look far more interesting:
From all of this I came up with my favorite idea so far! I decided to try and cast the shape of compressed items. I decided to go with cans and bottles because they would hold the plaster and resin best. Here are the results:
As you can see I did some in plaster, and the other in an acrylic resin mixed with a red pigment for color.
That was a bit of a catch up on what I've been doing, more to come soon!
Subscribe to:
Comments (Atom)


.jpg)


